My home waters in east-central Florida’s Mosquito Lagoon can be described as technical on the best days and downright difficult on many others. Our resident redfish and seatrout grow big on the shallow grass flats, but they are some of the most educated of their respective species you can find anywhere on the planet.
Angling pressure, clear water and the lack of tidal flow in the majority of the lagoon all contribute to the technical aspect of this fishery. With that being said, if you can catch fish here, you can catch them anywhere.
The challenge is coming up with effective fly patterns that are straightforward. Don’t get me wrong: I love to tie flies, but I am also a full-time fishing guide, and spare time is limited. So when I tie, it’s generally out of necessity. I prefer simple and effective patterns that I can crank out quickly. This makes banging out a few bugs for the next day’s charter seem like less of a chore. Throwing on some tunes and sitting in front of my old Renzetti Traveler vise with a splash of rum then becomes a welcome break from the regular routine of being a skiff guide, not just another hour tacked on to a long day.
Design Philosophy
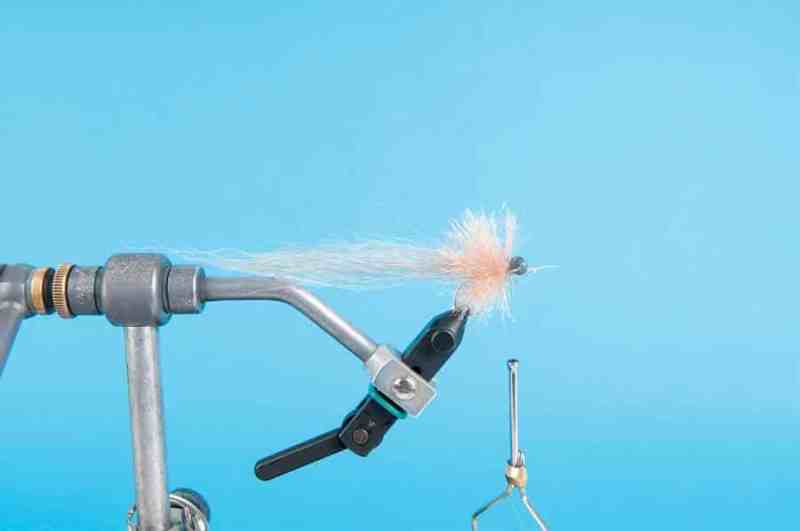
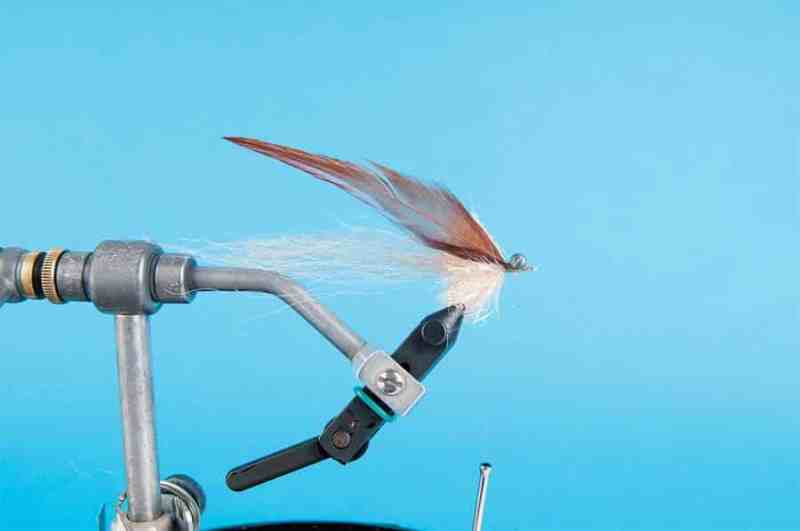
I keep a few things in mind when I’m creating a new fly pattern. For one, I am not a huge fan of flash. I’m a firm believer in a less-is-more approach. On countless occasions, I’ve had fish flare off a fly when the flash lit up after a strip. The sink rate of a fly is equally, if not more, important. I want a fly to sink level and flat, not nose down into the grass. I love a big salad with my steak, but fish generally have different eating preferences. A grass-covered fly is pretty much useless. For the fish in the Lagoon especially, I want my flies to land softly. Shallow-water fish are almost always on high alert, and a hard-landing fly can spook them easily. But it can be tricky to come up with a fly that sinks and still lands with finesse. The No-Name Shrimp follows my thought process of fly design and has proved effective on the educated redfish and trout in my area.
Color and Size
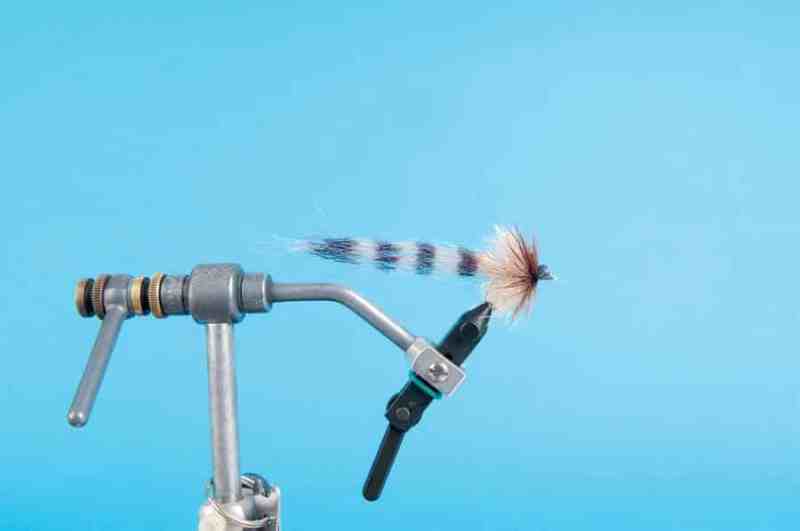
As with any fly pattern, simple changes in color make the No-Name Shrimp useful for multiple species, different locations and different conditions in general. I tied the original pattern to imitate a shrimp by using basic browns and tans. However, altering the colors to more closely match the hatch is certainly a good idea. Also, in some areas, you might want the fly to stand out so the fish can see it better. In cases like this, throwing in a little chartreuse or bright orange is a good option. In the Mosquito Lagoon, we have more than two dozen species of shrimp, and they all vary in size and color. Tan-, brown-, green- and gray-color shrimp are the most common, but there are plenty of times when certain conditions cause the shrimp to take on interesting colorations. In some cases, I have forgone shrimpy colors altogether. I tie a variation in the exact same manner but with all black materials, and it has proven to be deadly — especially on black drum. An all-chartreuse dressing with a red collar is becoming one of my go-to patterns for seatrout in deep water. I’ve also found that combinations of this pattern in purple and chartreuse work great in the Louisiana marsh on big redfish. Don’t target only redfish and trout with the No-Name Shrimp. I’ve had great luck using the standard version of this fly on tripletail, and I’m anxious to tie a larger version in solid chartreuse and try it on beach-cruising jacks and cobia — I have a feeling they will love it. And you’d better believe that I will be toting along a few No-Name Shrimp on my next Florida Keys bonefish trip.
The No-Name Shrimp is a simple pattern I developed using my philosophy of fly design. Try wrapping a few for yourself, and you’ll find they’re simple to tie and nearly impossible for multiple species of fish to resist in just about any salty destination.
MATERIALS
HOOK: Gamakatsu SC15, No. 1, or Mustad C47S D,
No. 2 (Gamakatsu sizing runs on the small side)
THREAD: Brown Uni Ultra, 140-denier
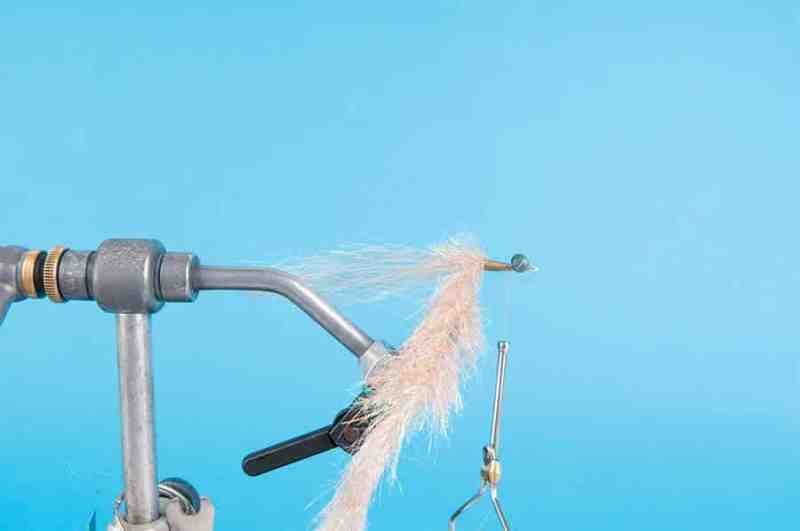
BODY: Camel Fishient streamer brush, 1-inch
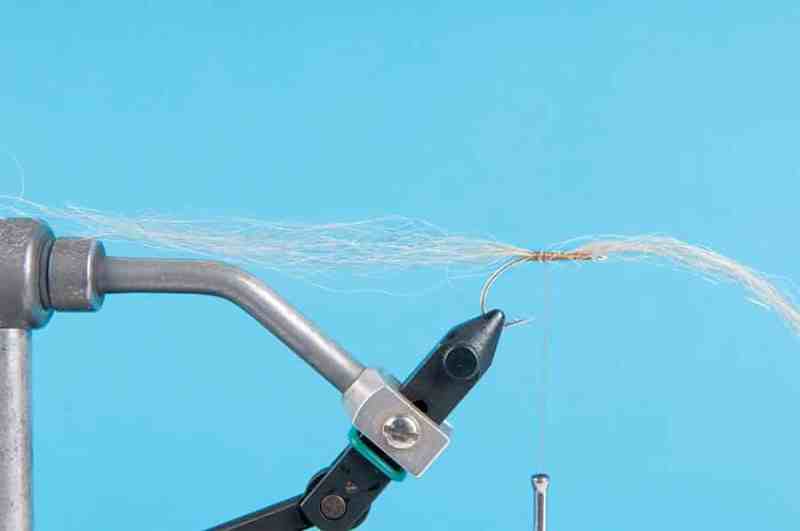
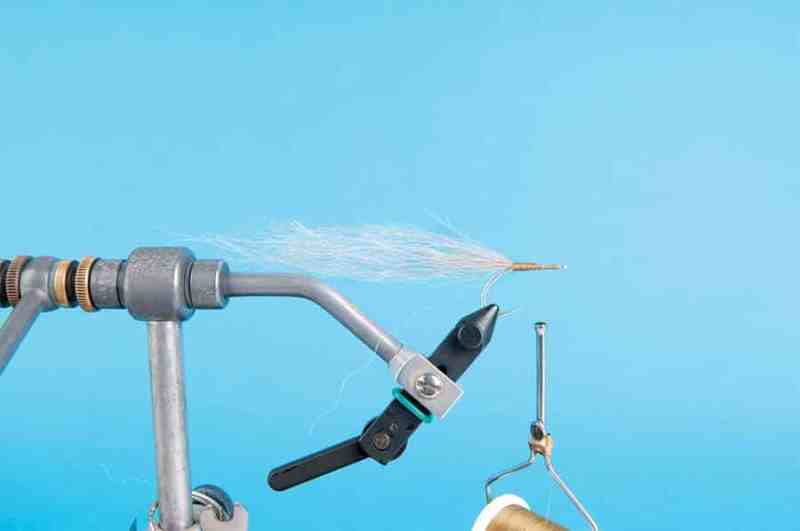
TAIL: Mullet-brown Steve Farrar’s flash blend
COLLAR: Brown saddle hackle
EYES: Lead eyes, small
WEED GUARD: RIO hard mono or similar, 20-pound
VISUAL: Watch the how-to video and learn to tie the No-Name Shrimp.