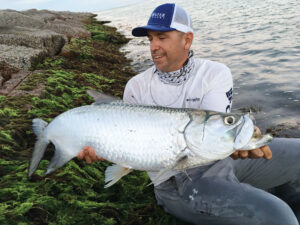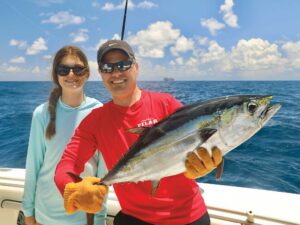
Fishing kites can’t seem to shake that South Florida live-bait-sailfish-tactic stereotype. Yet they’ll catch a wide variety of coastal and offshore game fish in a number of locales. Aside from sails, we’ve taken blue and white marlin, yellowfin and blackfin tuna, little tunny, dolphin, wahoo, sharks, cobia, Spanish and cero mackerel, and barracuda under a kite, and even the largest king mackerel taken on my boat, a 663⁄4-pound monster. I know anglers who also use them for tarpon.
Fear Factor
Intimidation seems to deter beginners from kite-fishing. Start simple, with just a bait or two. As you gain experience, progress to more-advanced kite deployments. Soon you’ll be fishing two kites with three to four baits off each one, plus flat- and deep-lining dead baits on the other side of the boat.

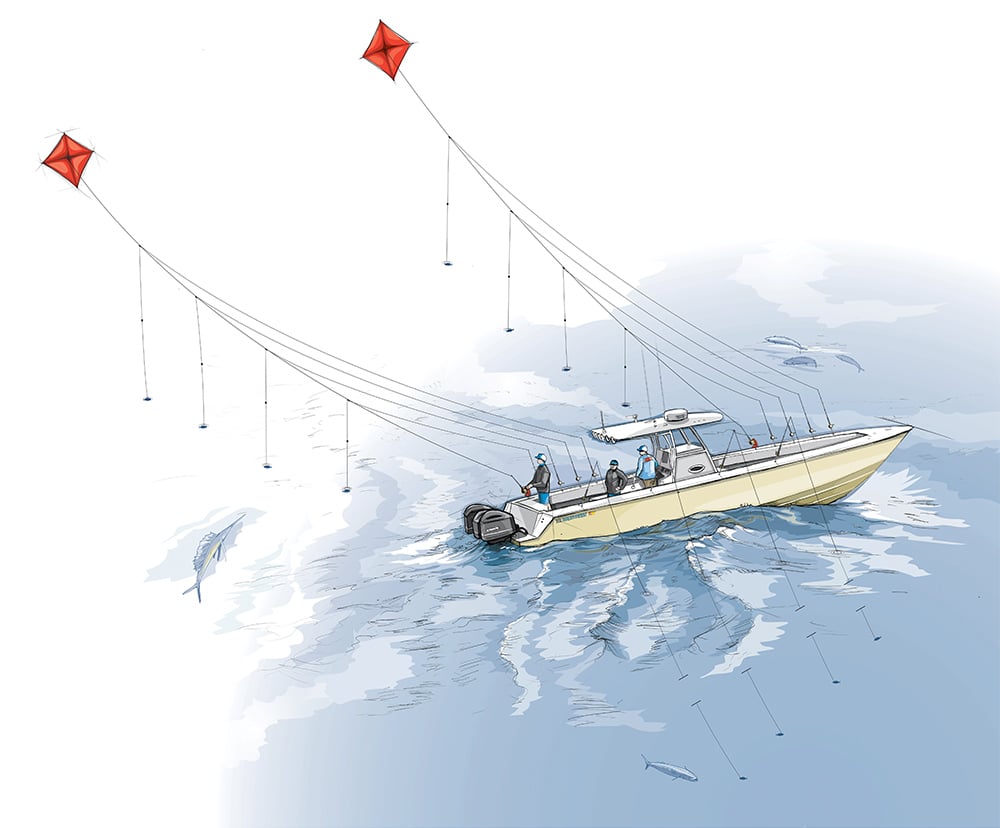
[B] A pair of subsurface flat lines, one from each transom corner, flank a long center-rigger bait to cover the area behind the boat.
[C] Tweak the forward motion of the boat to hold baits over a productive zone.
[D] Set one kite line farther back to increase the area covered. Mike Sudal
Shake, Shake, Shake Your Baits
Mechanically, kite-fishing amounts to a kite on its own line, along which you slide one or more release clips.
The fishing line from each live bait is placed in a release clip, then carried away from the boat and suspended from the kite line. When a fish hits, the fishing line pops out of the clip, leaving the kite deployed and the line free to fight the fish.
Read Next: Expert Tactics for Florida Sailfish
A kite presents a live bait at the surface, where its splashing and distress vibrations ring through the water like a dinner bell. The hook and leader remain out of the water, so stealth is also a benefit. With two kites flying at staggered distances from the boat, the swath of ocean you cover increases immensely.
Here are the essentials needed to catch more fish airborne-style.

[B] Space barrel swivels and release clips every 60 feet along the kite line.
[C] An additional barrel swivel may be added here, for the optional snap-on release clip.
[D] Place the largest hole in the inboard release clip to allow passage of outboard swivels.
[E] Clip with the smallest hole lies farthest outboard. Mike Sudal
Pick a Kite
Kites are built for specific wind conditions, and the different configurations are often indicated by the color of the kite. Bob Lewis Kites sells X-Tra Light and Light (4 to 10 mph), Medium-Heavy (10 to 20 mph), X-Tra Heavy (20 to 35 mph) and Gale Force (35-plus mph) versions. AFTCO has one that performs up to 16 mph, whereas SFE has versions for wind approaching 35 mph.
Adjustable bridles ensure smooth and straight deployments. And once you graduate to using two kites, both can be steered away from each other by adding split shot to the outside corners.
Kites also can be flown in little or no wind by affixing a helium-filled balloon to the backside of the kite with an accessory such as the Kite Thong or Ztrapon. Keep a few of these and a small helium tank on board; you’ll be the envy of others as you dangle live baits on a flat-calm sea.

[B] On retrieval, release clips slide over barrel swivels.
[C] Take care to keep the kite out of the water when retrieving. Wet kites don’t fly well!
[D] Rubber tubing or a float prevents the snap swivel from jamming in the kite-rod tip. Mike Sudal
Kite Reels
A conventional reel holding 270 yards of 50-pound mono, or 750 yards of 50-pound braid or Dacron, and a specially-built 3-foot kite rod (a rod blank with a tip-top) makes an excellent manual setup.
Read Next: How to Add 12-Volt Outlets to the Boat
For more convenience, there are electric drives that pair up with 20-, 30- or 50-pound-class reels, such as those from Elec-Tra-Mate and Hooker Electric, that deploy and retrieve a kite automatically. However, drives and electronics require power sources, an undertaking if your boat isn’t already rigged with outlets.
Got a Line on You
Choosing a kite line is the second step in setting up. Mono in 50-pound-test is a popular choice. Though economical, it has a larger diameter than braid and Dacron of the same breaking strength, plus it stretches and is less durable. Braid is thinner, has no stretch and good longevity, but it’s pricey.
While 80-pound works well, 65-pound is best for light winds. Dacron in 50-pound-test is flatter and easier to handle, and a bit less expensive than braid, but its larger diameter may pose deployment issues in light winds.
It all comes down to preference, conditions, and what you become most comfortable using.
Stack ‘Em Up
The only complicated part of rigging a fishing kite is the kite line itself.
Fill a reel with your line preference, slide a piece of rubber tubing or an outrigger stop ball onto the line for a bumper, and then tie on a ball-bearing snap swivel to attach to the swivel on the kite bridle.
Strip 60 feet of line off the reel, cut it, and slide on a kite release clip with the smallest diameter hole. I use Black’s Marine kite clips, available with three different diameters. Connect the main line to the cut-off end with a barrel swivel large enough to prevent the release clip from sliding back over it.
Strip off another 50 to 60 feet of line, cut it, and slide on a release clip with a slightly larger diameter hole, and then reaffix that section of line with a barrel swivel just large enough to keep the second clip from sliding back over it.
Peel off a third 50- to 60-foot length of line and repeat the procedure, using the largest diameter clip and a barrel swivel large enough to keep this clip from passing over it. Peel off another section of line, cut it, and reattach with a barrel swivel (there’s no release clip here); this swivel, should you wish to fish five baits, will accommodate a snap-on kite release clip.
During deployment, the kite line slides through the release clips, spacing them evenly along the line at 60-foot intervals. During retrieval, the clips slide over the smaller swivels ahead of them, enabling you to wind the kite all the way to the rod tip. The rubber tubing or ball stop at the end prevents the snap swivel from jamming into the retracted release clips.
With electric drives, set the drag just firm enough to hold a kite in place, but loose enough to stop it from jamming and breaking off when it reaches the retracted release clips and rod tip, in case someone forgets to mind the reel and shut it off once it has retrieved everything fully.
The Outfits
I use 25- to 40-class high-speed lever-drag reels filled with 20-pound mono plus 30-foot-long, 40- and 50-pound fluoro wind-on leaders (Bristol knot to Bimini twist). Prior to tying on a circle hook, I slide a ceramic ring onto the fishing line to loop over the wire bail on the release clip to guard the mono line against chafing.
Ballast is necessary on the fishing lines to manage bait position beneath the release clips. Therefore, under the ceramic ring, slide a 2- to 4-ounce egg sinker above a kite-line marker (float) and spacer bead. Each line carries a different color float for easy visual reference. Knot a piece of a No. 64 rubber band onto the line under the float to hold it in position on the leader.
A float can be positioned higher or lower on the leader by sliding the rubber-band stop prior to setting a kite bait. If the float reaches the rod tip when fighting a fish, just continue winding; it’ll slide down the line.
A circle hook completes the rig. For toothy predators, add a small barrel swivel and a foot or so of light wire above the hook.
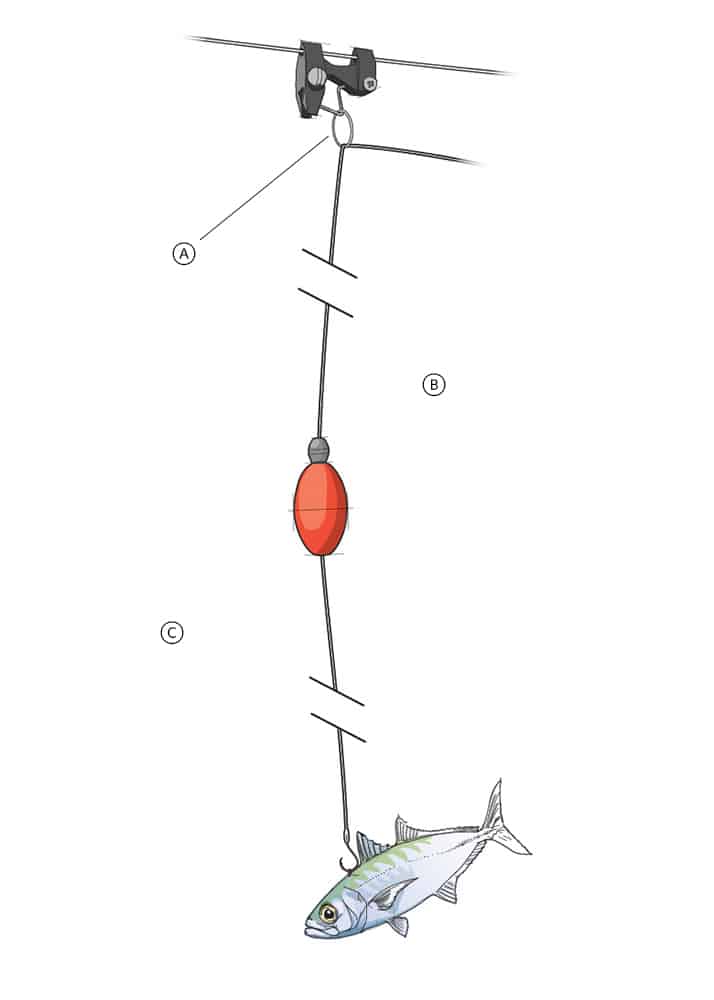
[B] Large, bright float provides visibility at a distance. An egg sinker keeps the leader hanging vertically.
[C] Bait bridled through the back (see below) remains free to swim and struggle at the surface. Mike Sudal
Bridling for Success
Bridling the bait keeps a hook exposed and makes it less likely to turn back into the bait. Orthodontist-style rubber bands make for fast bridling. Slip the band over the hook and grab it with a rigging needle. Pass the needle and half the rubber band through the bait’s back, ahead of the dorsal fin. Next, slip this end of the rubber band back over the hook, twist the hook to tighten the rubber band, and pass the hook point under the rubber-band bridle, against the bait’s back.
Go Fly a Kite!
Launch a kite in clean air, away from back drafts caused by consoles and T-tops. As the kite slowly ascends, the first swivel will catch behind the first release clip. Snap the ceramic ring on that fishing outfit into the release clip and adjust its tension setting. Affix that outfit’s hook to the reel. Put the reel in free-spool with the clicker on, advance the kite to the next release clip, and repeat the procedure with the next fishing outfit. Position the last outfit (shortest bait) so its release clip is about 60 feet away from the boat. At this point, the hooks from all outfits will still be affixed to their reels.
Bridle a bait onto the far outfit, flip it into the water, and slowly reel it into position underneath the far clip. Do the same with the other outfits.
Read Next: Tactics for Mid-Atlantic Yellowfin Tuna on the Surface
Once all baits are in position, their rods must be constantly monitored; a gust of wind may lift them from the water, requiring some free spooling, or the wind could drop some, enabling the baits to swim several feet under the surface. A constant management of baits is required to ensure they stay right on the surface. And, of course, there’s the constant watch for a strike.
Setting the Hook
When a fish rises to a kite bait, make sure the leader remains out of the water, with the bait at the surface, to reduce tangling. Free-spool on the strike until the fish fully engulfs the bait.
Next, point the rod tip to the release clip and wind rapidly; the tension will open the clip and drop slack line onto the water.
Rapidly wind up the slack, paying attention to the direction in which the fish is heading. Follow the fish and aim at it as you come tight, and keep reeling until the fish runs off the line.
In the process, keep an eye out for a second or third fish around the remaining kite baits. It’s all part of the game, and then some.