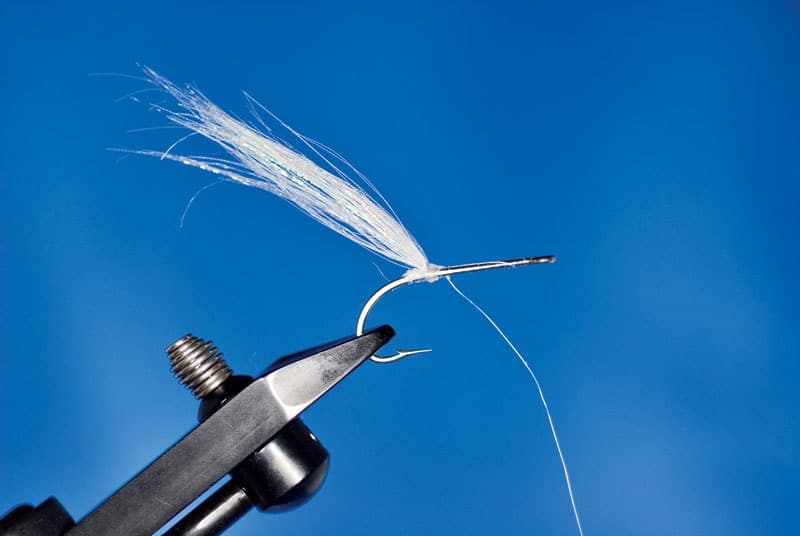
Step 1: Secure the monofilament thread to the hook shank, wrapping to a point vertically above the centerline of the barb’s length. Cut a length of white Holo Fusion that is about the diameter of a wooden match. Make the tips uneven to avoid a brush-like look. Secure the material (1 1/2 times the hook length) on top of the shank, facing forward..Bob Rifchin
Tying the DNA Bunker
Step 1 (continued): Pull the material back and secure it with wraps of monofilament. These wraps secure the wing in an elevated position leaning back, but are not on top of the material. They are in front, compressing the DNA between the mono anchors. A drop of cement or CA glue secures this step, acting as a stiffener.
Tying the DNA Bunker
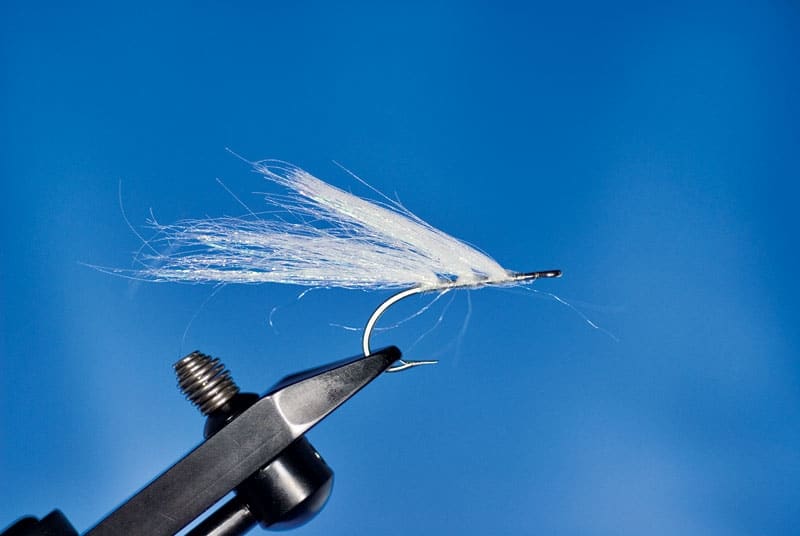
Step 2: Repeat Step 1 three times on the top of the hook, moving toward the hook eye each time.Bob Rifchin
Tying the DNA Bunker
Step 3: A fourth step with rose over silver-gray is placed just behind the hook eye, facing forward like the others.Bob Rifchin
Tying the DNA Bunker
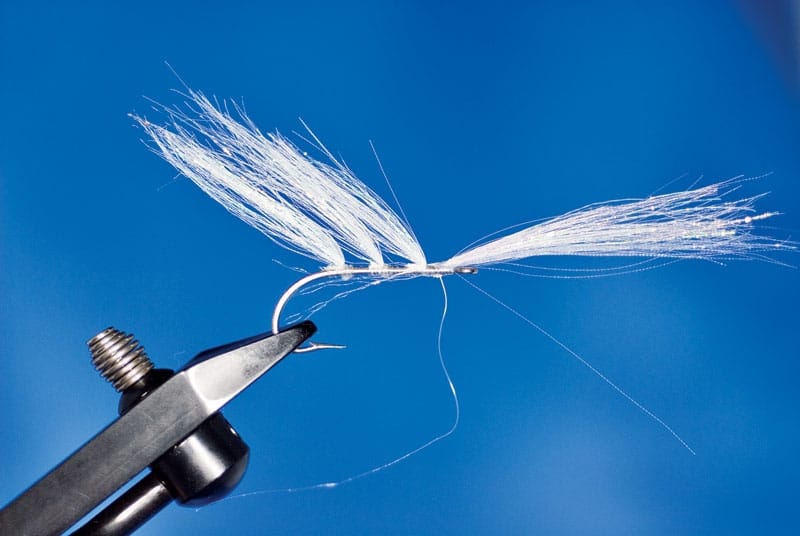
Step 4: Folding back reverses the colors. Note here that we are crowding the eye a little bit. This is intentional, as the increase in material and bulk provides a better base for attaching eyes.Bob Rifchin
Tying the DNA Bunker
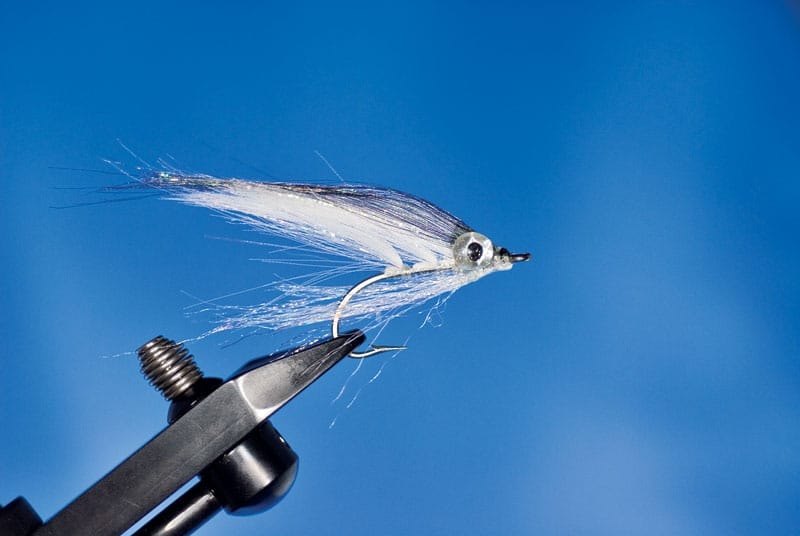
Step 5: Lastly, black is tied on top of the shank. Chromosome Flash is secured on the bottom, forming the belly (both colors should be slightly longer than the rest to help taper the fly). Taper the head of the fly, apply eyes and coat with Five-Minute Epoxy to finish.Bob Rifchin