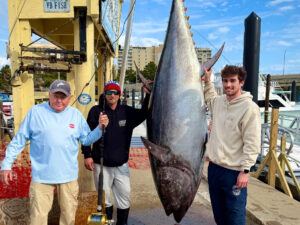
| To find fish wherever they lurk, anglers must have the right ‘ducer for the job. |
The most critical and overlooked part of a fishfinder is the transducer. It’s not especially sexy, as it doesn’t have all the bells and whistles and customizable features associated with the modern echosounder. It’s a part of the fishfinding system you rarely see once it’s installed, and you probably won’t give it a second thought unless it quits working. But it merits some serious attention if you want to get the best performance from that fancy equipment on your console.
A couple of considerations – mounting location and specific qualities of the transducer – determine how effectively your sounder does its job. Let’s look at placement first. There are three ways to mount a transducer in your boat, and the one you choose depends most on the your hull.
The most complicated is through-hull mounting, where a hole is cut in the bottom of the boat and the transducer is mounted flush with the bottom, so the transducer face is in direct contact with the water. Through-hull mounting is the most efficient way to get the best performance out of a transducer, according to the experts at Simrad, a major manufacturer of top-end transducers for recreational and commercial fishing and research boats. Patrick Belen, Regional Manager, Fisheries Acoustic Equipment, explains:
“Direct contact with the water is the most efficient transducer mount. That way every single ounce of power that you put in the transducer goes into the water. There are some considerations, though. You have to make a hole in the hull, which some people don’t want to do, though there are seldom problems with this. If the instructions are followed, you have assurance of 100-percent safety.”
The beam of a transducer set to 200 kHz, left, covers less area but shows much more detail. This is the frequency that’s most useful for shallow-water applications. The 50 kHz transducer beam, right, sacrifices some detail for a broader beam, useful for searching deep water.|
Belen explained that not all hulls are suited for this treatment. Placement of tanks, assorted rigging or structural members can create problems when it comes time to cut through the hull – especially if you are installing a transducer on a boat you already own, as opposed to installing it during construction. There may be other objections, as well.
In-Hull Mounting
If you are uncomfortable with cutting a hole in the hull, another option is to mount the transducer inside the hull, flush against the bottom of the boat, and shoot the signal through the hull. The disadvantage here is the power loss that occurs when the signal must pass through the hull during transmission and reception. In the past, this was much more of a problem than it is today. Even with the power loss, an in-hull mount has some advantages. One other consideration is that an in-hull transducer won’t work if your hull is cored, such as with end-grain balsa or foam. In this case you’ll need to go with a through-hull or transom mount.
“In-hull is a much faster and less-expensive way to mount the transducer,” says Belen. “You don’t have to pull the boat out of the water, and installation is much easier. It is not as efficient as a through-hull mount, but it is workable, especially with today’s transducers. Things have changed. In the last five years there have been substantial efficiency gains in transducer designs, so they work much better though the hull. Modern transducers – all of them, not only Simrad – have become very efficient. I was looking at Airmar’s new models that are designed specifically for in-hull installation and the numbers are extremely good, very efficient. Our transducers too are very high-end and our sport fishing models have 65- to 70-percent efficiency.”
Transom Mount
The third type of placement, on the transom, is usually reserved for smaller boats or when there is no access inside the hull for a through-hull or in-hull transducer. Transom mounting is the quickest and simplest way to mount a transducer, but it must be done properly.
“You have to be very careful where you mount the transducer in proximity to the propeller. Try to mount it as far outboard as possible, and separate it from the source of noise. Turbulence, bubbles, motor noise, all of these will interfere with signal transmission and reception. However, if properly mounted as far as possible from the source of noise, they work fine,” says Belen. “It will be as effective as the other mount locations, but it’s much more difficult to make it 100 percent.”
Transom mounting has some genuine advantages. First of all, this the most accessible place to mount a transducer. You don’t have to make large holes in your boat, and the transducer can be mounted above the waterline, so it’s easy to replace or repair if you have a problem. Nor-mally, hull-mount transducers are plastic, which makes them less expensive, says Belen.
Bubbles and turbulence can be a problem with other mounting positions, too. Both through-hull and in-hull mounts have to deal with this kind of interference.
“The farther aft the transducer is mounted, the more noise you will have in the system,” Belen explained. “But the bow wave creates a cone of noise, too. It’s a balancing act between getting the transducer forward of the engine noise, but keeping it far enough astern to keep it in clean water.”
Bill Knowles of Knowles Boat Company in Stuart, Florida, deals with transducer placement routinely. “Air is the enemy,” he says, explaining that where the hull meets the water, there is a thin curtain of air that can interfere with transducer performance. “What we do is put the transducer in the keel. On a center console, go through the keel. There is no white water along the keel.
“If the transducer is wider than the keel, we put a fairing block around it and that way it will work at any speed. If you can’t put it through the keel – I have a 43-foot Hatteras and I can’t get to the keel because of the fuel tanks – I mount the transducer on a fairing block on the hull. It looks like a submarine cut in half, and it works even in the wake of another boat. Try to keep the block as small as possible, but also try to get the transducer away from the bottom where the disturbed water is.”
Choose the Right Frequency
Once you’ve determined where the transducer will go, it’s important to buy quality. Jeff Condiotty, Fisheries Research Manager for Simrad, deals with high-end gear for commercial fishing and fisheries research. The choice available, he explained, is either split-beam or single-beam technology. Split-beam is used by commercial and research vessels. It’s pricey, but it’s the best system going.
“The split-beam transducer receives in four quadrants, so we know where in the beam the target is and we can place it in relation to the boat. With a single beam, everything appears directly beneath the boat. Get a split-beam if you have the money – they run $20,000 and up – otherwise, single-beam, with dual frequency, is the way to go,” says Condiotty.
Which is what most of us will settle for. Dual frequency is the order of the day for most sport fishing applications – unless you just happen to have that extra $20 grand laying around waiting to be spent on a fishfinder. Dual-frequency transducers transmit both 50 and 200 kHz. Because 200 is a multiple of 50, the same transducer will ring on both frequencies. It transmits and receives on both at the same time, and you decide which one you want to look at by selecting the display at the screen on the console.
Basically, the lower the frequency, the better the penetration, so 50 kHz handles the deep-water chores, though target identification can get sketchy. At 200 kHz, targets are well defined but the beam is narrow, and this frequency is best used for shallower applications, say down to 200 feet or so.
“Think of a flashlight beam, like that on a Mag-Lite,” says Condiotty. “Narrow the beam and it becomes more intense and shows more detail. Think of this as the 200 kHz frequency. At 50 kHz, it’s like a wider beam on the flashlight – you get wider coverage, but less definition. A wide-beam 200 kHz transducer would be ideal, but the transducer would have to be so small it wouldn’t handle enough power to be of much use.”
So the obvious compromise is the dual-frequency configuration. At up to 1,500 feet of depth, you can use both frequencies and learn to interpret the picture displayed on the screen. And, you can set up with a top-notch, single-beam, dual-frequency system for under $5,000, according to Condiotty.
Buy Smart
Mike Hillers, Fisheries Products Manager for Simrad, offered some suggestions for making practical decisions on a transducer purchase. “The place to start is size,” he says. ” The basic rule of thumb is the bigger the transducer, the narrower the beam and the more power it can handle. The bigger ones cost more, but you’re getting something for that.
“Some of the bluefin tuna guys, when they chum, they want a wide beam to see their chum line and see the fish coming in. You couldn’t see this with a narrow beam, but with a 50 kHz, which produces a wide cone angle, you could. Therefore, a 50/200 dual-frequency transducer is a nice, inexpensive way to get it all.”
There are other options, too, if you want to get really serious about using your depthsounder. “If a guy really wants to win tournaments, he will buy three individual transducers,” Hillers explained. “He tunes one for low frequency, say 38 kHz, to look in the canyons. Then he has a 50 kHz transducer, and another tuned to 200 kHz. This way he can look at all three frequencies at the same time. Ideally, he would have three separate machines, one for each transducer, but you can also hook up multiple transducers to one display screen. That’s a less expensive way to do it.”
A common mistake, Hillers explained, is to buy a transducer by price, or to fit the boat, instead of one to meet your needs. “I hate to see a guy who is going to go fish the canyons walk off with a transducer that’s too small. He is going to be unhappy with the results. What you want to do is back into the decision. Determine what you need for the fishing you do, then buy a transducer based on what is going to best suit your specific purposes.”
It may take some inquiry, beyond the markings on the box, but it is well worth your while to get the most efficient transducer you can, in order to take advantage of the power your depthsounder is putting out. What you should look for, according to the experts at Simrad, is an efficiency rating of greater than 50 percent. This allows you to maximize the power output of your sounder, which translates directly into seeing fish and the bottom. “There can be a lot of wasted energy with an inefficient transducer, and you want to eliminate it,” says Hillers.
The money you spend on the transducer is the best you can spend on a fishfinder, according to Hillers. “If I buy a $3,000 echo-sounder and a $70 ‘ducer, I’ve wasted my money. I’d rather have a $1,000 transducer with a $2,000 sounder and get a much better system.”
Think of your transducer like you do your propeller – just because you don’t see it working doesn’t mean it isn’t critical to your success.