Tying a fly basically means tying your common sense around a hook. Sometimes it is a long and arduous process of evolution to develop a product worth keeping. Other times, it is simple.
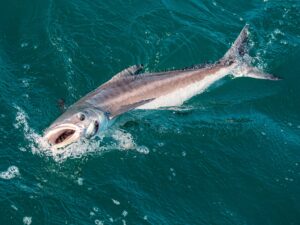
Whether or not I pioneered anything, I certainly perceived it that way in 1997, as I struggled to hook tarpon in the Bahia Honda channel in the Lower Florida Keys. It was my first time to the area, and I rarely saw anyone fly-fishing there; only bait fishermen. I had never even heard of a palolo worm before that season and didn’t pay much attention when I did hear about it.
I thought I would be able to fool fish with my versions of traditional patterns tied better. While I had never fished with a store-bought fly, I had never designed a good fly from scratch either and didn’t really know where to begin.
Beginnings of the Stiff Worm
I remained entirely focused on the fish in the channel during that first season in 1997. It became a personal challenge. My experience began with high hopes and premature self-confidence, but it soon turned to frustration. I went through every pattern I could find and was constantly in my fly books trying to improve on other men’s ideas.
I embarrassed myself daily throughout that year and into the next, casting my arm off every afternoon, by myself and unsuccessfully, to the countless schools of tarpon rolling through the area. But those frustrations and failures ended the moment I saw the worms hatch for the first time.
Once I realized the fish go nuts for these little worms, it was a quick and sensible step to try and imitate them. Although most flies I had seen were designed to behave like something rather than look exactly like something, I have rarely gotten away from tying imitations. I try to think like a fish, and my standard practice is to study the real thing as best I can and run prototypes back and forth in the water while inspecting the differences.
I captured a bunch of worms and kept them alive in my baitwell for a few days. I observed their size and color, of course, but more importantly, their shape when they swam. Palolo worms are soft when you pick them up, but when submersed, they appeared to me like stiff and straight little rosy sticks zipping through the water.
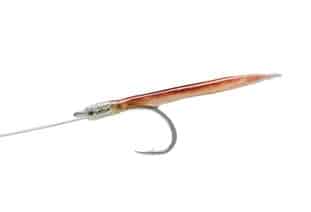
Hence, my first pattern was a stiff and straight fly, rosy in color. The stiffness resulted from trying to keep my materials streamlined, as I never observed much wiggle action when the worms swam.
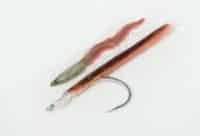
My design has always been of similar size to the worms, and once I got the color down, I had it. I started by using markers – blending them because the worms’ usual appearance is a shade between red and orange. But then I stumbled across a Clay Rose colored marker in an art store, and after mixing with the silicone and epoxy exterior, it created an exact match. The heads of palolo worms are slightly different shades from worm to worm, but their body color is consistent. I’ve changed my fly in subtle ways over the years, but I’m back to fishing with almost the same exact thing I started with: a stiff little rosy stick.
All in the Presentation
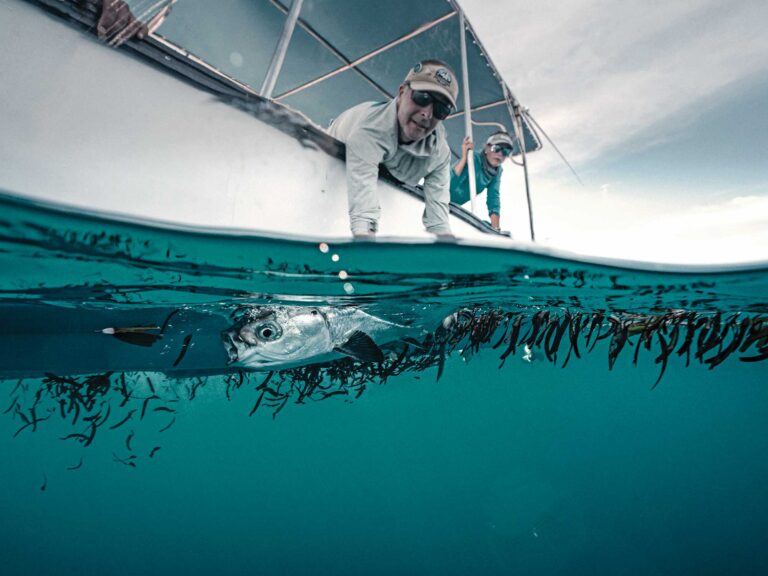
Size is important, color is important, but retrieval is absolutely critical. Any guide in the Lower Keys can tell you the worms all swim in the same direction and at the same speed once they hatch, either on or heading up to the surface. So our best success is presenting that same action to the tarpon. It makes for a non-traditional stripping technique because unlike baitfish, the worms don’t pause. I have my unique style of retrieval, but style is not important. Making the fly do what the worms actually do is the key.
After the worms stopped hatching a few days after my first encounter with them, the fish didn’t seem to leave or want worms any less. In fact, my success rate was even higher with no natural competition. I regularly hooked the channel tarpon all through the end of that season on my fly, sometimes as many as 10 or 15 in an afternoon.
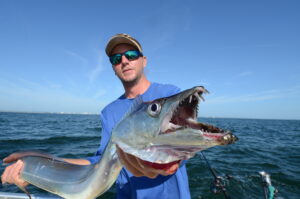
But things really got interesting on the first day of the following season. I was in the backcountry in early April, and although it was months before the worm hatch and a long way from the Bahia Honda channel, the first tarpon I presented my worm fly to ate it. I quickly learned the real triumph of the pattern was its success on the flats, including areas without hatches and at different times of year.
In fact, I haven’t fished in the Bahia Honda Channel much at all since I figured that out. In my opinion, the biggest misconception about worm patterns is that they are generally assumed to only be useful in and around hatches. Not true. It is now my “go to” fly from April through July, and I use it anywhere in the Keys.
It is easy to tie and easy to cast. Because it’s small, it has a real advantage in tricking tarpon over many other patterns. But because of that small size, it’s also more difficult for fish to notice, and I tend not to use it in dark or murky conditions.
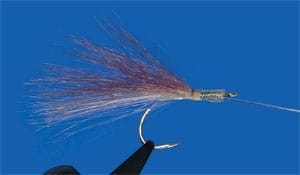
But whenever I have a picky-fish day, I go right to my smallest and best Stiff Worm. It’s my pride and joy, and I wish you great luck with it. Here’s how to tie one.
Next Page: Instructions
Materials
HOOK: Gamakatsu SL12 1/0 (silver) or Owner Aki 1/0 (black)
**THREAD: **White, flat waxed
BODY: White fish hair
COLOR: “Clay Rose” #137 Prismacolor marker
FINISH: Silicone (Goop) and two-part epoxy
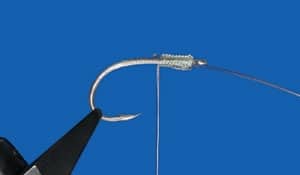
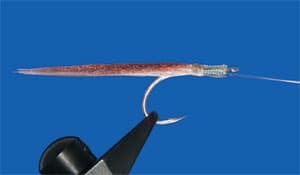
| Step 1: Cover hook shank with thread base, and snell leader onto hook with approximately 8 to 12 wraps (depending on line diameter). This is more wraps than necessary for knot integrity, but a huge snell knot imitates well a worm’s upper head. The rings of the knot are almost identical to the worm’s bumps, with the same light, translucent look. Furthermore, the knotless appearance of snelling also helps tremendously with picky fish. I try to use silver hooks on light bottom situations and a black Owner hook over grass. |
| | Step 2: Layer on white fish hair. I don’t think brand is important, but different types absorb the color from the marker differently. Layering the fish hair rather than clumping it all on at once simply adds to the fly’s durability. |
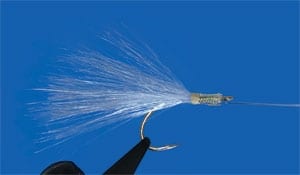
| | Step 3: Color the upper layers only, as the worms have light bellies.|
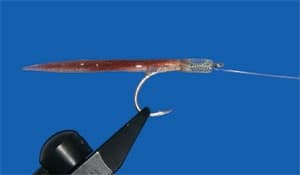
| | Step 4: Silicone the material into a straight form and allow to dry (at least one hour).|
| | Step 5: Epoxy over the hardened silicone body, including a light coat over the back of the knot. I have tried using only silicone, and I have tried using only epoxy. Silicone alone gets mushy, and epoxy alone is too heavy and hard to work with, and it distorts the color. The combination has served me well and adds to the translucent look. |
|