Unless you own carbureted models or have diagnostic software installed on your laptop or tablet, there are limits as to what an owner can do to service today’s digital outboards. But with common hand tools and shop supplies, a few do-it-yourself projects help prevent bigger problems, save money and leave you free to concentrate on fishing.
“At least once a season, pull the propeller off and check for fishing line behind the thrust washer,” says Mike Paulette, the senior certified technician for Shields Marina in St. Marks, Florida. Paulette works on Evinrude, Honda, Mercury, Suzuki and Yamaha outboards. “If you find line plus water in the gear oil — it’ll look milky — there’s a good chance the prop-shaft seal is leaking and it’ll need replacing. But if everything checks out, including the prop hub and blades, grease the shaft with a quality waterproof grease and reinstall the prop. If it has a plastic hub, torque it to 80 foot-pounds; otherwise, to the manufacturer’s specifications. Make sure the prop spins freely and then replace the cotter pin with a new one.”
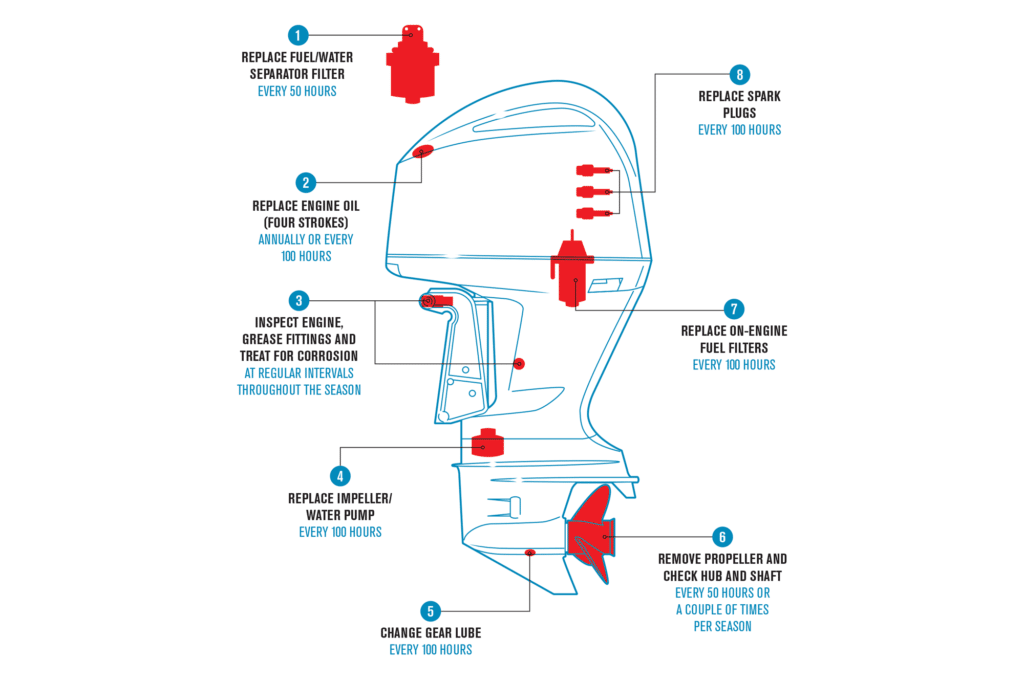
Changing the lower-unit oil is another simple project. After placing a drip pan under the gear-case bullet, Paulette says, unscrew the top vent plug and inspect the magnetized end for metal shavings. Shavings could mean major trouble. Next, pull the bottom plug (also magnetized) and let the oil drain until it’s just a slow drip. Using factory-recommended gear oil and a pump adaptor, pump the reservoir full through the bottom drain hole until it starts seeping out the top vent hole. Replace the top screw, and then quickly disconnect the pump and replace the bottom screw. You’ll waste a little oil, but it can’t be helped. I also recommend draining the lower unit out of the wind to avoid a big mess.
Paulette strongly suggests using nonethanol fuel, but a 10-micron fuel/water separator filter is critical for optimum performance regardless. Factory OEM filters are the best replacements, although quality after-market brands like Racor may be substituted. Fuel filters should be replaced every 50 hours or every season, depending on boat use. After the old one is removed, Paulette says to lube the filter gasket with a light coat of grease or oil. To ensure proper flow, fill the filter with gas and then carefully screw it back into the housing. Hand tighten only.
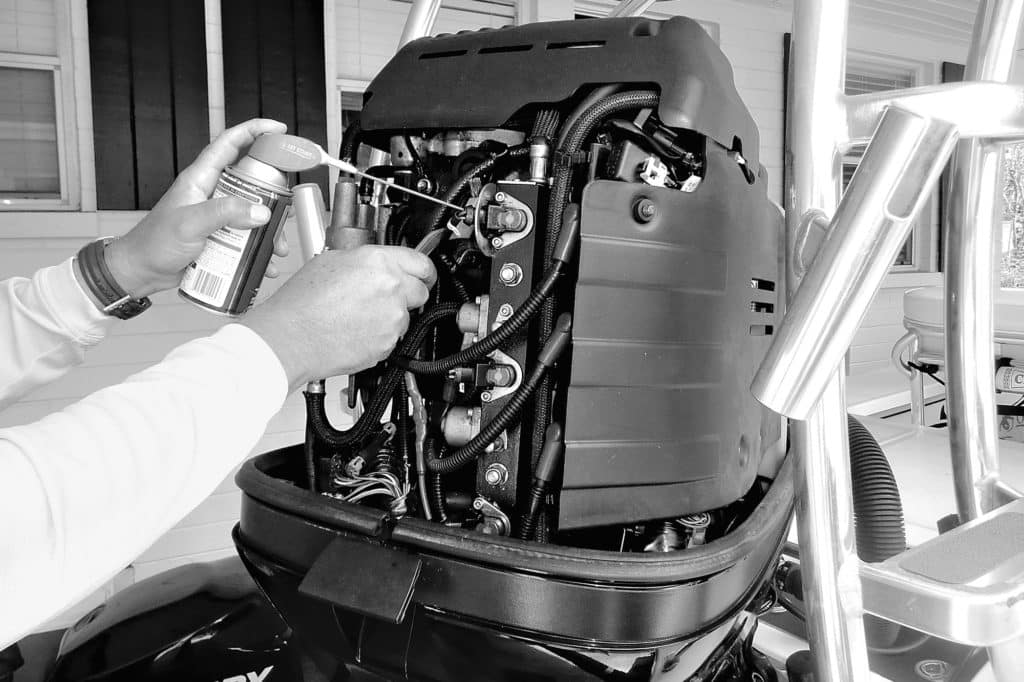
Next on the list is visual inspection and corrosion prevention. Remove the cowling and look the components and wiring over carefully. Split hose ends and green, corroded terminal connections and sticky throttle or timing levers will require more attention. Wasps and other insects often build nests inside engines that are used infrequently. Throttle and shift cables need to be checked for corrosion too. Some outboard models also have accessible small filters, like an in-line fuel or vapor-separator tank filter under the cowling that should be replaced on a regular basis. When everything checks out, use a water-displacing spray or silicone lubricant to coat the parts and seal out moisture. Thwarting saltwater corrosion is a never-ending battle, so inspect and spray often. Grease all fittings periodically too.
Spark plugs in fuel-injected engines are designed to last much longer than their carbureted predecessors. But when they do need replacing, it’s not difficult to handle, Paulette says, by swapping out one plug at a time. Start by pulling the rubber boot off the terminal at the top of the plug. Using a plug socket and ratchet, back the old plug out of the powerhead. An extension and universal joint might be needed for the lower cylinders. Carefully thread the new plug in by hand to avoid cross-threading, then tighten with the socket until snug. Push the wire boot back onto the terminal until it seats firmly.
“It’s a simple procedure with all outboards except Evinrudes, and the only difference there is lining up the electrode with the injector,” Paulette explains. “Mark which way the electrode opening is pointing on the insulation with a magic marker and just make sure that mark is lined up facing toward the injector when the plug is fully tightened.”
Depending on your mechanical skills, there are more outboard projects that can be done with simple tools, without taking the boat in for service. The owner’s manual is a valuable reference, along with service manuals that can be purchased online from the engine companies or dealers. Yamaha publishes Maintenance Matters, a handy booklet (it’s also on yamahaoutboards.com) with tips and instructions as well.
Just like fishing tackle, routine maintenance helps prolong the service life of the engine and keep the boat ready to go fishing whenever you are. So consider that time well spent.